The recommend receipt is the Star TSP 100 ECO using the Firefox or Chrome browsers. Other customers have had success with other printers from companies such as Epson. If you plan to purchase a different receipt printer than the recommend, try to get one that prints on paper that is 72 mm or greater.
WINDOWS SETUP
Install Driver For Windows
Go to driver download page: https://starmicronics.com/support/receipt-printers/
Download & Install the driver software "TSP100 futurePRNT Software" from the page above. Follow the on screen setup wizard after downloading.
Chrome Setup
- In Chrome click the menu button at top right of screen (three vertical dots) (as shown below) and choose Print
Chrome menu
- In the dialog the pops up; match your settings on left dialog as shown in image below (**You will need to click the link more settings to reveal margins and paper size)
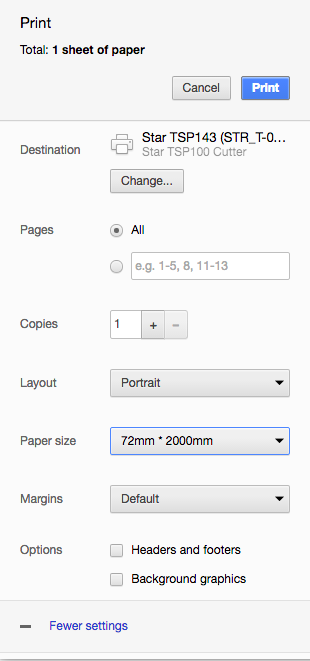
Dialog for printer settings
- You can now print and that is IT!
Disable printer dialog confirmation for Firefox (Printing without interaction)
- Type about:config at Firefox’s location bar and hit Enter.
- Right click at anywhere on the page and select New > Boolean
- Enter the preference name as print.always_print_silent and click OK. Then set the boolean value to true.
- Restart firefox
- In CoreStore make sure you have the preference "Print Receipt After Sale" checked in store config/settings. This will ensure printing will happen without clicking anything when completing sale.
Disable printer dialog confirmation for Chrome (Printing without interaction)
- Launch Chrome and check that the Chrome Version is at the latest version
- Type about:flags in the address bar and ensure that the Disable Print Preview flag is NOT enabled (Print preview must be enabled for Kiosk Printing to work)
- Close the browser
- Find the browser shortcut on your desk top, right click and select 'properties'
- Append the following text to the end of the target field: --kiosk-printing
- Save, and launch Google Chrome. It should now load in full screen (kiosk) mode
- The print preview will appear on your screen, but will instantly print a receipt to your default printer.
Paper Size Setup for Receipt Printer
- Go to my computer -->Control Panel->Printers
- Right click on Star TSP 100 --> Printer Properties
- Click Device Settings Tab
- In the Form to Tray Assignment choose 72mm x Receipt
Cut receipt when print copies/duplicate
- Go to control panel --> Devices and printers
- Right click printer --> Printer properties
- Click Device Settings
- Change Page Cut Type --> Partial Cut
MAC SETUP
Install Driver For Mac
- Go to driver download page: Driver Download Page

Download the CUPS driver
- Find the file from your recent downloads folder and extract it:
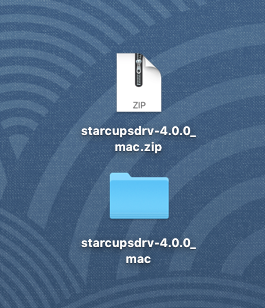
Extract the folder by double clicking it
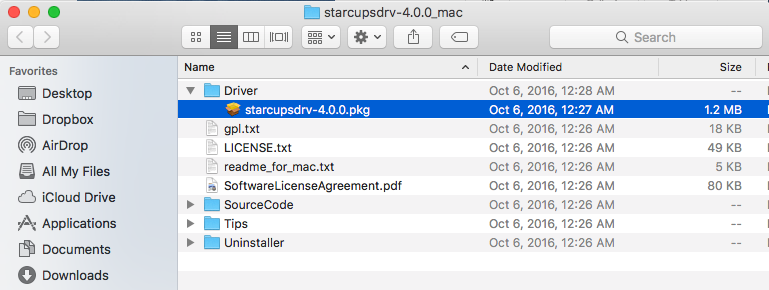
- Find the Installer pkg file and open it:
Click "Next" on each step to complete the installation.

Click "Next"
Admin Password Required
You will need to have your admin password in order to complete the installation.
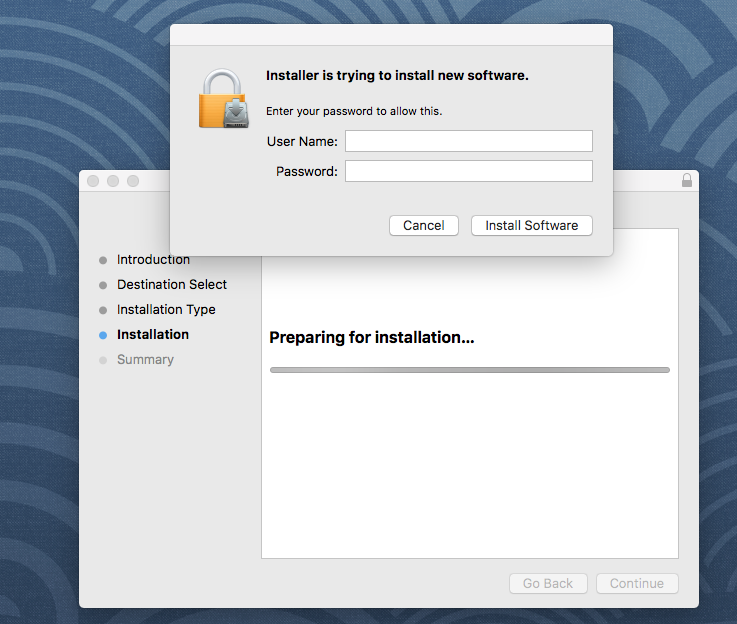
Enter your Admin Password for the computer.
Once you have installed the CUPS driver close the Installer.
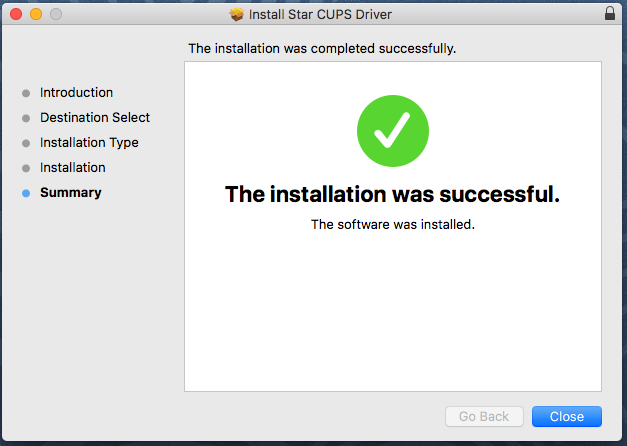
Finished installation. Click "Close"
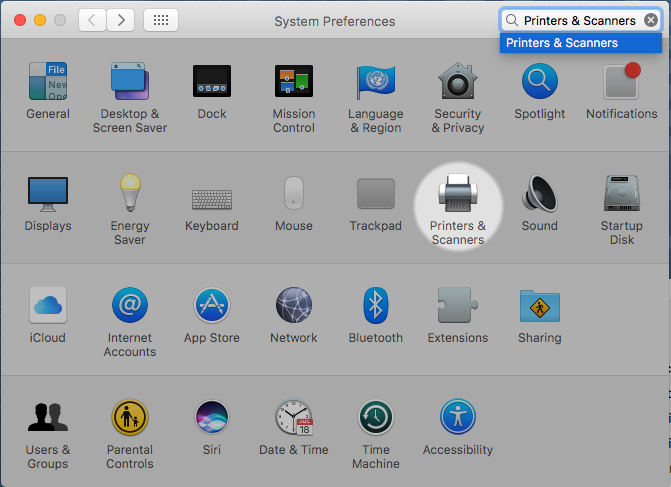
Add Printer
Open Printers and Scanners
Click the "+" button to add the printer
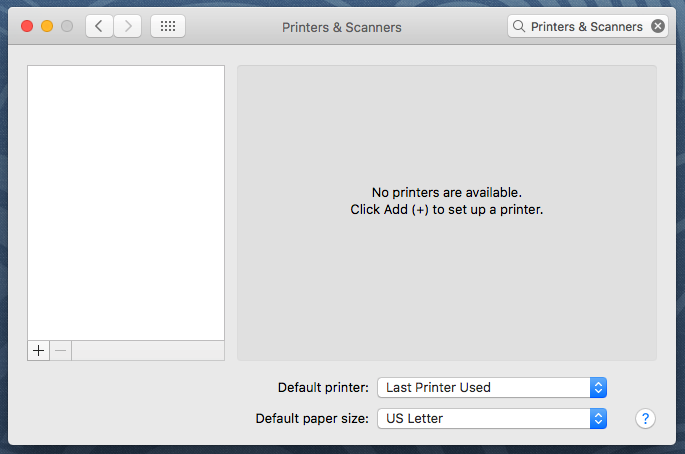
Click the "+" Sign
Copy these exact settings except change the Address to match what your printer has.
If you dont know what the IP address of the printer is follow "Obtaining IP address of Wireless LAN Printer Installation" below.
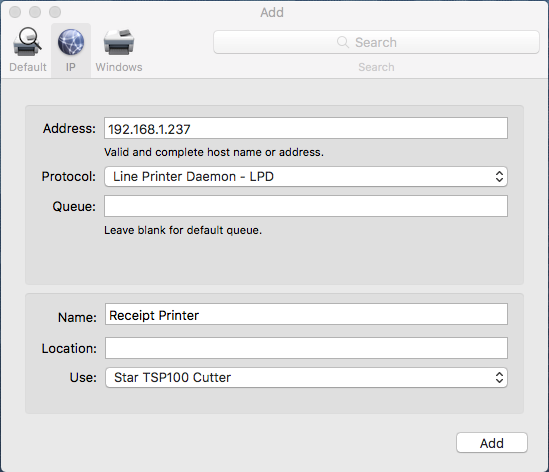
Once you've put in all this information click 'Add'. Your printer should now be able to print.
Obtaining IP address of Wireless LAN Printer Installation
Wireless or LAN Printer Setup
If you are installing A LAN or Wireless printer Obtain the IP Address by following the Wireless Printer Setup Bellow:
If you are setting up the wireless LAN version of the printer you will need to obtain the ip address it was assigned.
To perform a hardware self test on your printer:
Turn it OFF
Hold the feed button down and turn the power back ON at the same time
Release the feed button. This will print out two test receipts.
At the bottom of the second page, it will show 'Current IP Parameters Status'.
Hang on to this page or make a note of the IP Address.

Cash Drawer Setup
Once you've got the printer all set up, you can connect up the cash drawer.
The cash drawer connects to your receipt printer, and is triggered to open when you finish a sale and the receipt is printed by the printer.
To setup the Cash Drawer:
Plug the RJ12 connector cable (the one that looks similar to a phone line) from the cash drawer into the receipt printer.
Head to the following URL: http://localhost:631/printers/. This will take you to CUPS. CUPS is a network printing service used by Mac computers. It allows you to setup your printers on a network, and customise options such as cash drawer setup.
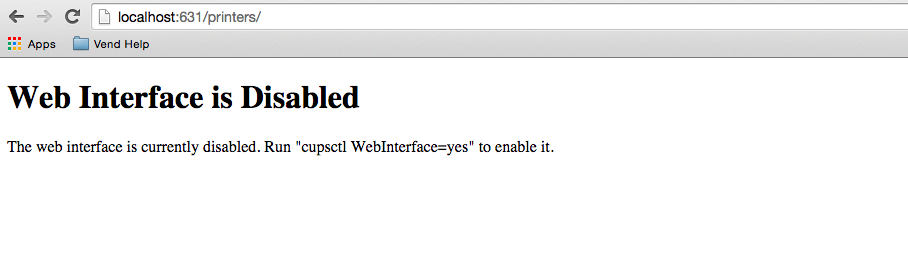
Receive this screen?
If you receive a Web Interface is Disabled notice simply run the provided command in terminal.
If you receive this notice:
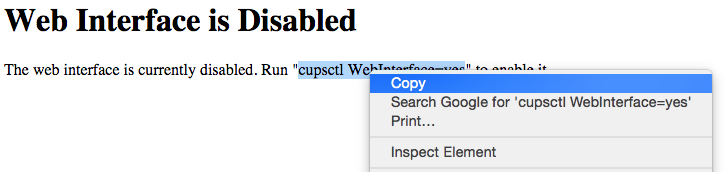
Copy the command:
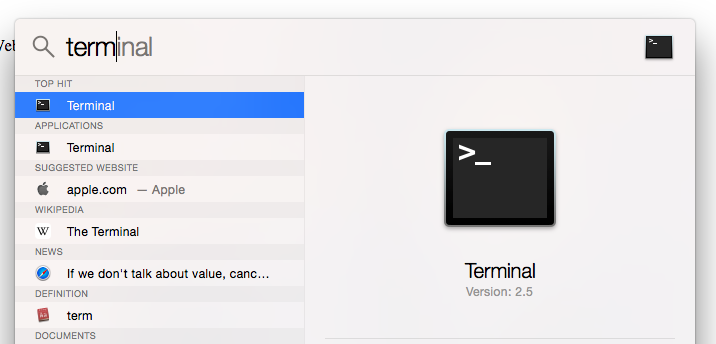
Find terminal with Spotlight Search and Open it:
Paste in the command and hit Enter:

Paste In the Command and Press Enter
Once you are in CUPS, Select your printer model from the list below:

Click on the Printer
From the Administration action Dropdown list select Set Default Options:
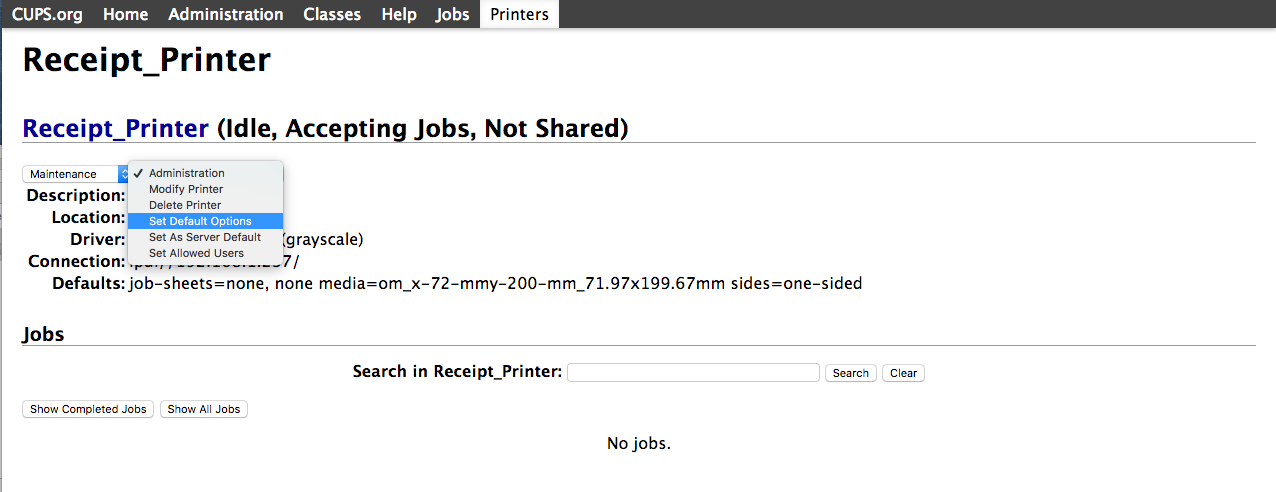
Select Set Default Options
Set the following Options:
General:

Cash Drawer Control

STAR TSP 100 LAN PRINTER PLUS SETUP FOR IOS/ANDROID
- Connect the printer to your router
- Download the CoreStore app from Apple App Store or Google Play
- Make sure your iOS/Android device is on the same network as your printer
- Click the print button on the receipt or click the print button in the menu
- Select the printer on dialog that pops up.
- Your DONE!
STORE LOGO ON RECEIPT

The store logo is 255 x 90. It looks best if this is a black and white logo only.
Was this article helpful?
That’s Great!
Thank you for your feedback
Sorry! We couldn't be helpful
Thank you for your feedback
Feedback sent
We appreciate your effort and will try to fix the article